Last Updated on June 9, 2023
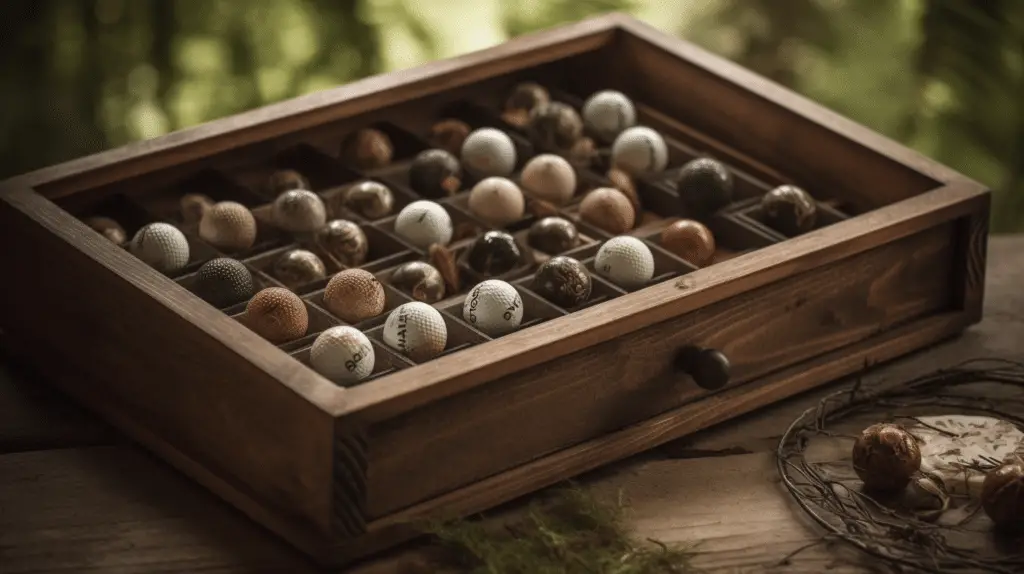
Golf ball display cases are a great way to store and show off collections of golf balls, as well as commemorate memorable shots. Display cases can be designed in many different ways to fit the desired design preference and space availability. It is important to consider material selection, size constraints, placement location, and other factors when constructing the case. This article will present an overview of how to build a golf ball display case that meets these criteria.
Materials and Tools Needed
Constructing a golf ball display case requires several materials and tools. A suitable wood for the construction of the frame should be chosen, such as birch or pine. The dimensions of the frame will depend on how many golf balls are to be stored in it. In addition to the wood, cutting tools like saws and jigsaws may also be needed to cut the pieces precisely. Other items include glass shelf brackets and screws, hinges, glue, sandpaper, paint or varnish, and safety goggles. Pre-made frames can also be purchased if desired.
Measuring and Cutting the Wood
Accurately measuring and cutting the wood is a crucial step when building a golf ball display case. After gathering all of the necessary materials and tools, it is important to ensure that each piece of wood has been measured correctly in order to create a well-built structure. It may be helpful to mark measurements with a pencil before attempting any cuts.
The first step is to measure the length and depth of the base pieces needed for the display case. These measurements should be taken from the outside edge to the outside edge so that they fit together precisely. Once these measurements have been made, use either a saw or mitre box to cut along the marked lines. Careful attention must be paid while making sure that each cut is straight and even, as this will affect how well the pieces fit together later on in the project. With accurate measurement and precise cutting, one can successfully construct their own golf ball display case.
Assembling the Frame
The first step to assembling a golf ball display case is to construct the frame. This will involve cutting and joining wood pieces together with screws, nails or bolts. To do this, one must begin by measuring out the lengths of wood necessary for the frame assembly. Once all the measurements are taken into account, the next step involves cutting each piece of wood accordingly. It is important to use sharp tools when doing so in order to achieve clean edges on the wood pieces. After this has been completed, it is time to assemble the frame itself. The joints should be glued together and then secured using either screws, nails or bolts, depending upon what material was chosen for construction. All four sides of the frame should now be secure enough that they form a rectangular shape.
Adding a Backing
When building a golf ball display case, adding backing materials is essential for providing support and structure. First, it is important to select the appropriate material that will be used as the backing board. Materials such as plywood or MDF (medium-density fiberboard) are commonly used since they provide strength and durability.
To add additional support, other materials may also be needed:
- Nails – Use nails to attach the backing board securely to the frame of the display case.
- Screws – For extra reinforcement, screws can be added in addition to nails.
- Glue – Applying glue along with nails and screws helps create an even stronger bond between pieces of the display case.
- Clamps – These are useful if you need assistance positioning items together before nailing or screwing them into place.
- Wood Filler – After attaching all components, use wood filler to fill any gaps left behind by drill holes or imperfections in the wood/MDF itself. Once dry, sand down for a smooth finish prior to painting or staining your display case.
By following these steps when adding backing materials, your golf ball display case should have a sturdy foundation for displaying your prized collection safely and attractively.
Installing Shelves and Attaching the Glass
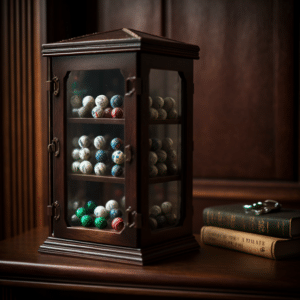
Next, installing shelves and attaching the glass is necessary to complete the golf ball display case. Shelves should be secured using screws or other appropriate fastening hardware for furniture assembly. The distance between each shelf should be marked carefully with a pencil before securing them in place. It is important that all of the shelves are level and even, so take extra care when measuring out the locations. After this step is completed, attach the protective glass to the frame of the display case. This can be done by screwing it into place from either side of the frame. Make sure that all of the edges are flush with one another and that there are no gaps in-between them, as this will prevent dust particles from entering inside. Once both steps have been completed, your golf ball display case is now ready to use!
Finishing Touches
The final touches to the golf ball display case require staining the wood, adding padding, and hanging the display. Staining the wood ensures that it is protected from environmental damage, such as water or sunlight. This will ensure a longer life for the piece of furniture. Additionally, it adds an aesthetically pleasing look to any room in which it is placed.
| Stain Wood | Add Padding | Hang Display |
|---|---|---|
| Protects from environmental damage | Adds cushioning layer around balls | Makes displaying easier and more secure |
| Enhances aesthetics of any room | Increases longevity of product | Allows easy access when needed |
Adding padding inside the case helps keep the golf balls securely stored while also protecting them from long-term wear and tear due to constant handling. Finally, hanging the display on a wall allows for better visibility and easier access when one needs to take out or put back a golf ball. It also makes sure the item doesn’t get damaged if someone accidentally bumps into it while walking by. With these finishing touches completed, your custom-made golf ball display should be ready for use!
Frequently Asked Questions
What Type of Wood Is Best to Use for the Display Case?
One option for those looking for a strong yet visually appealing material is hardwoods such as walnut, cherry or oak. These can be combined with other woods like plywood or MDF, depending on the desired outcome. Additionally, certain softwoods like pine or cedar provide good structural support while also offering unique grain patterns that look great once stained and sealed properly.
- Walnut
- Cherry
- Oak
- Pine
The weight and dimensions of the finished product should also be taken into account when selecting wood; lighter materials may be necessary if portability is desired, but they will not always provide the same level of durability as heavier options do. Finishing treatments can further enhance how well each type holds up against damage from wear and tear over time, so it is worth researching what methods work best for any given application. Ultimately, careful comparison between different wood types will result in finding the right combination for creating a golf ball display case that looks stunning and serves its purpose reliably for years to come.
How Do I Decide on the Size of the Display Case?
The size of the display case is one of the most important considerations when building a golf ball holder. It must be large enough to hold all of the desired golf balls and small enough to fit in its intended space. Size measurements need to be taken into account, taking into consideration both the size of the golf balls as well as any additional accessories that may need to fit inside.
Conclusion
In conclusion, it is important to consider the type of wood best used for a golf ball display case. Hardwoods such as oak or cherry may provide greater stability and durability than softer woods like pine. It is also essential to assess which size would be most suitable based on the number of balls and the width of shelves desired. Levelling each shelf is critical in order to ensure an even presentation and can typically be done with shims or adjustable feet. Finally, mounting the glass requires caution so that it fits securely onto the frame while at the same time avoiding potential breakage due to over-tightening screws or clamps. With these considerations in mind, one can build their own beautiful golf ball display case.