Last Updated on November 17, 2023
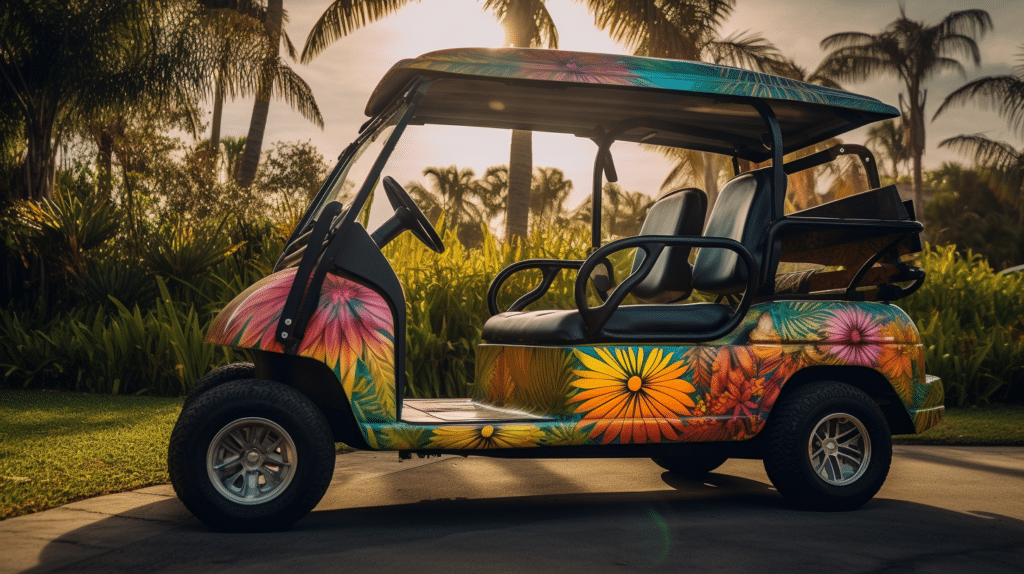
Are you looking for a fun way to customize your golf cart? Painting it is an easy and cost effective way to make it look like new again. With the right tools, some patience, and this article as your guide, you can transform your golf cart with a fresh coat of paint in no time!
Follow along step-by-step as we take you through the ins and outs of painting fiberglass golf carts. Keep reading to learn how to achieve beautiful results while keeping your project simple and stress-free!
Supplies Needed
Sandpaper will be necessary to prepare any rough spots on the surface of the cart before beginning with primer paint and a clear coat. An appropriate type of sandpaper should be chosen based on how much material needs to be removed from the cart’s surface. A high grit number in the range of 400-600 works best for only light sanding, but coarser sandpapers are available if more significant prep work is required. It’s also important to ensure you have enough primer paint and a good quality clear coat finish to complete your project correctly. The exact amount of materials needed will depend on size and condition of your golf cart. However, planning ahead can help save money by allowing you to purchase larger quantities at discounted prices.

Furthermore, having extra supplies on hand ensures not running out part way through the process so there won’t be any delays or surprises when working on the project. All that’s left now is to begin applying these materials according to established guidelines which include following safety protocols like wearing protective clothing and utilizing proper ventilation techniques during application and drying times.
Sanding Fiberglass
Before you begin painting your golf cart body, it’s important to properly prep the surface by sanding its fiberglass. To do this, you’ll need fine grit sandpaper and a good amount of patience. Start by securing the sandpaper on a flat hard block or piece of wood so that it won’t slip when in use. Then take your time as you carefully rub down the entire surface of the golf cart body with the sandpaper until any blemishes are removed and all glossy finishes have been dulled. This process can be tedious but will ensure an even coverage once paint is applied. Once you’ve completed sanding, make sure to clean off any dust particles before applying primer or paint for best results.
Masking Off Surrounding Areas
Next, it’s important to mask off any surrounding areas that need protecting. You’ll want to use a good-quality masking tape for this step and ensure all edges are properly taped off. Make sure you pay attention to painting the edges of your golf cart so that no overspray occurs on other surfaces. Once you have securely applied the tape, you can begin the painting process.
Allow enough drying time between coats when applying paint – consult the manufacturer’s instructions for exact details as these may vary based on product type. By following these steps and taking care in masking off the surrounding areas, you will achieve a professional looking finish with even coverage.
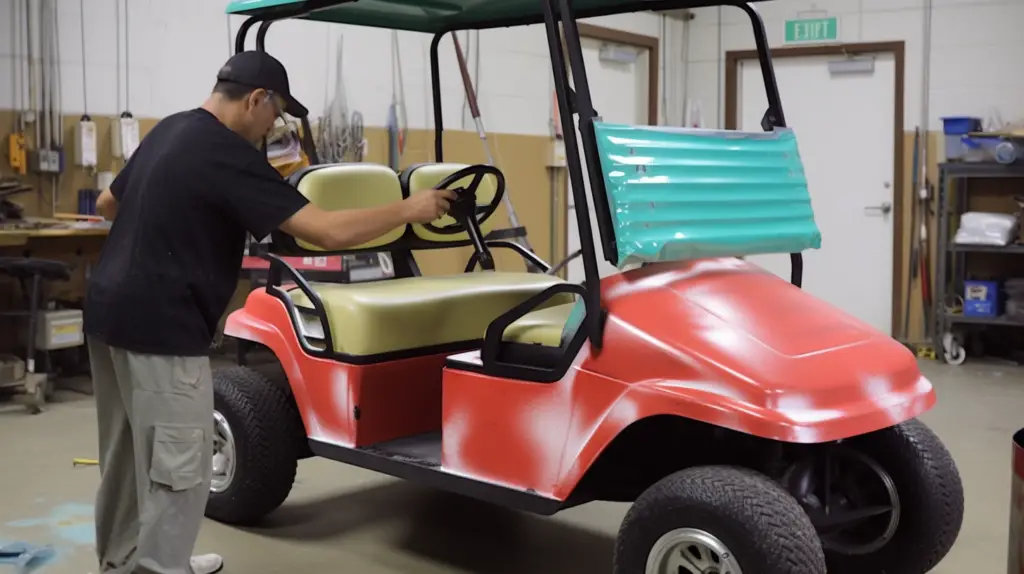
Paint Application Techniques
When it comes to painting a fiberglass golf cart, the method used can depend on the desired finish. For those looking for an even paint job with no visible brush strokes, spray painting is the best option. To achieve this look, make sure that you cover all areas of the surface evenly and keep your distance from about 12 inches away when applying the paint. Additionally, use light coats and allow time between each coat for drying so that there are no runs in the final product.
For those wanting more control over their project, using a brush or roller technique may be preferable. If opting for a brush technique, use high-quality brushes made specifically for oil-based paints and start by brushing lightly along edges before working into larger flat surfaces. When rolling out paint onto large surfaces, using long smooth strokes will help ensure even coverage without leaving any lines or obvious marks. It’s also important to avoid overlapping rolled areas as this can cause thick spots in some locations while others remain thin.
Applying Clear Coat And Allowing Time To Dry
Once the paint has been applied and dried, it is time to apply a clear coat. This will protect the paint from chipping or scratching and add an extra layer of shine. When applying a clear coat there are several important steps that need to be taken:
Prepare your surface:
- Clean any dirt off the fiberglass golf cart with soap and water
- Apply sanding blocks or electrical sander for smooth finish
Clear-coat application:
- Use brush or aerosol spray can to apply even coats of clear coat
- Allow each coat of clear coat to dry before adding another one (usually 10 minutes)
Drying time:
- Leave the fiberglass painting project alone until completely dry (usually 24 hours). It may take longer in humid climates.
It’s essential to follow these steps carefully when applying a clear coat, as improper use could damage the entire project. Once everything is complete, you’ll have a beautiful painted fiberglass golf cart!

Polishing For Shine
Once the fibreglass golf cart has been painted, it’s time to polish. Polishing can help make your custom paint job shine and bring out its best features. It also helps protect the paint from fading or chipping over time. Before you start polishing your golf cart, make sure all of the painting is completely dry.
To begin polishing, use a soft cloth to apply a rubbing compound to the entire surface of the vehicle. Rub in small circles until an even layer is applied across every part of the golf-cart’s body. Then allow this first coat to sit for at least 15 minutes before adding another thin layer of compound over top. Use moderate pressure when buffing and work in one direction only – not back and forth – which will produce a much smoother finish once complete. After both coats are finished, remove any excess residue with a clean microfiber towel and enjoy your gleaming new ride!
Frequently Asked Questions
What Is The Best Way To Protect The Area Around The Golf Cart When Painting?
In order to properly protect an area while painting a fiberglass golf cart, there are several methods that can be used. Covering nearby surfaces with plastic sheeting or cardboard boxes helps catch any paint particles before they settle. Taping off areas like windows and door frames ensures no paint gets left behind on these parts of the cart. Additionally, laying down newspaper or tarps prevents dust and debris from getting into wet paint. Finally, applying protective wax over the surrounding surface should help keep everything safe during the process of painting a fiberglass golf cart.
All of these techniques work together to create a successful outcome when it comes to painting a fiberglass golf cart – an outcome where both the painted part and its surroundings remain unscathed by stray droplets or dirt accumulation! Taking time to ensure each step has been done correctly allows for optimal protection against potential damage caused by painting.
Are There Any Special Safety Precautions To Consider When Painting A Fiberglass Golf Cart?
When it comes to painting a fiberglass golf cart, there are special safety precautions that should be taken into consideration. It is important to keep in mind the nature of the material you’re working with and how it will react to different treatments as part of the painting process.
To ensure a successful paint job on your fiberglass golf cart, here are five key safety points to consider:
- Wear protective gear such as goggles, gloves, and a face mask while handling hazardous materials like paints or solvents.
- Work in a well-ventilated area away from any source of fire or heat.
- Cover nearby surfaces with drop cloths before starting the painting process to prevent splattering paint onto other objects.
- Thoroughly clean the surface before applying any primer or paint for better adhesion.
- Allow sufficient time between coats and make sure each one has fully dried before adding another layer.
Taking these safety measures during the painting process can help protect both yourself and your fiberglass golf cart from potential harm while ensuring an attractive finish once complete. With careful planning and preparation, you can achieve great results when giving your vehicle a new look!
Is It Necessary To Use A Primer When Painting A Fiberglass Golf Cart?
When it comes to painting a fiberglass golf cart, one question that often arises is whether or not it’s necessary to use a primer. While some people might think this step isn’t necessary, the truth is that priming is an essential part of the process. Primer helps create a smooth and even base for your paint job, allowing you to achieve better results with fewer coats of paint.
Moreover, using a primer on fiberglass can help provide extra protection against rust and corrosion from exposure to water and other elements. This will help ensure that your golf cart looks great for years to come. Applying primer also allows you to cover up any cracks, scratches, or imperfections in the surface of the golf cart before beginning your paint job.
What Type Of Paint Is Best For A Fiberglass Golf Cart?
When it comes to painting a fiberglass golf cart, choosing the right type of paint is key. There are several options available, such as fiberglass paint, golf cart paint and marine paint. Each one has its own advantages and disadvantages that should be considered before making a decision.
Fiberglass paint is designed specifically for fiberglass surfaces and provides excellent protection against wear and tear. It’s also relatively easy to apply and can withstand harsh weather conditions like ultraviolet light or rain. On the downside, this kind of paint does not offer much in terms of color variety and may require multiple coats for an even finish.
Golf cart paint is another option often used on fiberglass golf carts due to its durability and low cost. This type of paint offers many colors from which to choose but requires more preparation prior to application than other types of paints. Additionally, it tends to chip easily so regular maintenance will be necessary over time.
Lastly, there’s marine paint which is commonly used on boats because it’s highly resistant to salt water corrosion and UV rays. However, this kind of paint doesn’t provide very good coverage unless applied in thick layers across large areas, so you might need up to five gallons depending on your project size. Plus, it dries slowly which means extra patience is needed when applying it properly.
Is It Possible To Paint A Fiberglass Golf Cart Without A Clear Coat?
Painting a fiberglass golf cart can be quite the project. But is it possible to paint one without using a clear coat? To answer this question, we must look into what type of paint should be used on fiberglass, and whether or not a clear coat is necessary.
When painting any material, you want to make sure that the right kind of paint is applied in order for it to stick properly and look good once complete. When it comes to fiberglass specifically, some experts recommend using an acrylic enamel based paint due to its durability and glossy finish when dry. A key factor in deciding which type of paint to use for your fiberglass golf cart will depend on how long you would like the results to last.
Though it might seem daunting at first, painting a fiberglass golf cart without a clearcoat isn’t impossible if done correctly with the right materials. It’s important to remember that proper preparation before applying the paint is essential for achieving optimal results, regardless if you’re applying a clearcoat or not.
Conclusion
In conclusion, painting a fiberglass golf cart is an easy way to give it a fresh new look. It’s important to take safety precautions when doing so, in order to protect yourself and the area around the vehicle. A primer should always be used before applying paint, as this helps ensure that the color sticks and lasts longer. When selecting paint for your project, make sure you choose one specifically designed for use on fiberglass surfaces.
Finally, keep in mind that clear coat isn’t always necessary. However, if added it will help seal everything together giving it a polished finish. With these tips in hand, you’re ready to get started on transforming your golf cart with some creative flair!